How to Fix Gap Between Toilet and Wall? – 4 Methods
You might not know this, but there are building codes that dictate the gap between toilet tank and wall. Most would recommend you go for a 1- to 2-inch distance. However, what if you end ... Read more The post How to Fix Gap Between Toilet and Wall? – 4 Methods appeared first on Arthitectural.

You might not know this, but there are building codes that dictate the gap between toilet tank and wall. Most would recommend you go for a 1- to 2-inch distance. However, what if you end up placing the toilet too far from wall?
In that case, you’ll need to learn how to fix gap between toilet and wall. Follow our guide to learn the proper way to address the situation.
Methods to Fix Gap Between the Toilet and the Wall
1. Use an offset flange
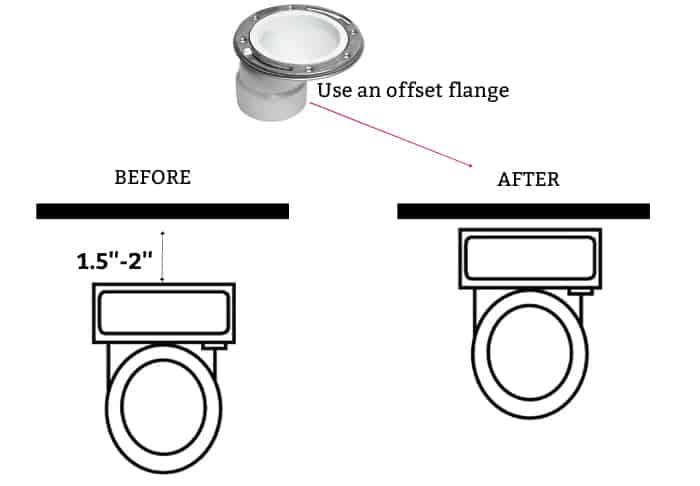
With a toilet flange, you can move the toilet 1.5 to 2 inches closer to the wall. The process is also relatively simple, as you don’t have to tamper with the plumbing system to narrow the large gap.
In order to bridge the space between toilet and wall with an offset toilet flange, here are what you should do:
Step 1: Remove the toilet
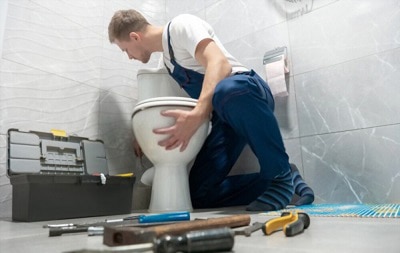
- Turn the shutoff valve behind the toilet clockwise. Then, flush the toilet until the tank is empty and soak up the remaining water in the bowl with a sponge or towel.
- Remove the bolts on two sides of the toilet’s base.
- Put a bucket under the shutoff valve and disconnect the water supply line.
- Use a knife to scrape off the existing caulk.
- Remove the toilet from its place.
- Cover the sewage pipe with a dry rag or towel.
Step 2: Prepare the area for the offset flange
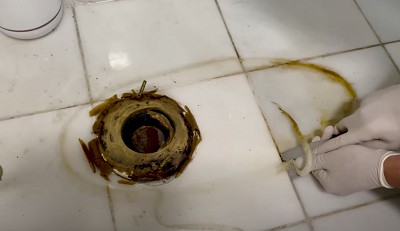
- Remove the wax ring. Then, scrape off the remaining caulk on the floor with a putty knife.
- If there’s any existing toilet flange, remove it by using a screwdriver to unscrew the bolts.
If you have difficulties removing the flange, get a hammer and a chisel to pry off the component.
Step 3: Install the offset flange
- Unplug the sewage pipe. Apply PVC glue around it.
- Slide the offset flange into place so that it’s flush against the floor. Note that it should have the same diameter as the old toilet flange.
- Screw the offset flange into place. If its screw holes don’t match the existing ones, use a hammer drill to create fastener holes.
Step 4: Put the toilet into place
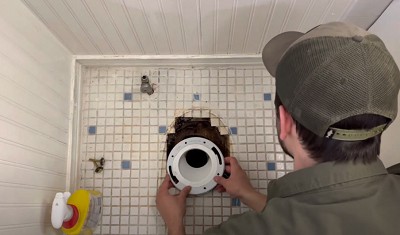
- Place a new wax ring on top of the offset flange.
- Put the toilet back onto the wax ring.
- Screw the toilet’s bolts, so the fixture remains in place.
- Reconnect the water supply line and turn on the shutoff valve.
2. Relocate the plumbing system
If the problem is too severe for the offset flange to fix, it’s best to just restructure the plumbing system so that you can move the waste pipe elsewhere. This way, you can place the toilet against wall or anywhere you want.
The issue with this method is that it’s very complicated and not suitable for DIY projects. For starters, you’ll have to tear off your floor and subfloor to access the plumbing system. Then, you must have enough expertise to redesign the pipe layout without violating any building regulations.
In any case, it’s best to have professionals take care of the task for you. To fill gap between toilet cistern and wall with this method, set aside a budget of $1000-$3000.
3. Hide gap between toilet from wall
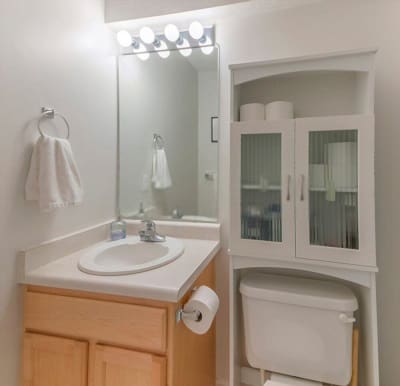
Tampering with the toilet or its plumbing system can be rather daunting. If you don’t want to get your hands dirty, you can just hide the toilet tank too far from wall.
In my experience, I find over-the-toilet storage the best option when you unintentionally have a toilet cistern not touching wall. Not only will this approach cover gap between the fixture and the wall, but it will also provide more storage space and make your toilet seem taller.
You don’t need a big budget to fill space behind toilet following this solution, either. Most over-the-toilet storage options cost around $50 to $130. So right off the bat, you can see how it’s several times cheaper than relocating the plumbing system.
4. Use toilet tank wall spacer braces
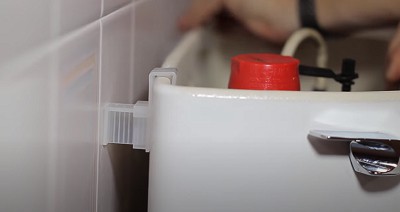
When the slight gap between the toilet and the wall causes the cistern to feel wobbly or leak when someone leans on it, you can simply put securing braces behind it. The process is pretty simple too.
- Remove the toilet tank lid.
- Place the brace onto the toilet so that its end is flush against the wall.
- Mark the position where the edge of the tank is.
- Cut the brace according to the marked line.
- Snap the clip onto the brace.
- Slip the brace’s clip into the toilet tank’s edge.
- Repeat the step for the other side.
- Close the lid.
What is an Offset Flange? What Are Its Benefits?
A toilet flange, in general, is the component that fits between the toilet’s base and the waste pipe underneath to prevent leaking. With the closet flange installed, your toilet will not wobble when someone sits on it.
An offset flange is a variation of a standard closet flange. The main difference between the two is that the former is off-centered, whereas the latter features a straight pipe connected to a flat disk.
The most distinct advantage of an offset flange is that it allows you to move the toilet 1.5 to 2 inches away from the waste pipe. Therefore, it can come in handy when space or awkward toilet positioning is an issue.
Distance Between Toilet and Wall
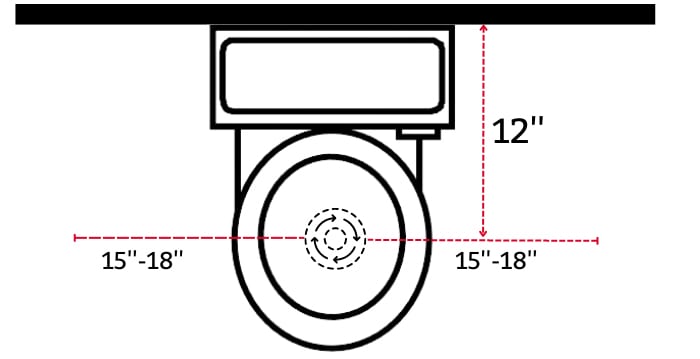
When moving the toilet closer to the wall, be sure to follow building codes that dictate the minimum distance between the two. Below are a few rules of thumb you should follow. Note that the measurements are taken from the center of the toilet to the closet fixture (rough-in distance):
- The minimum toilet hole distance from wall behind it is typically 12 inches.
However, this figure can change depending on what toilet model you’re getting. This is why you can sometimes come across toilets with 10”, 14”, or even 16” rough-ins as well.
Among the three rough-in variations above, the 14-inch and 16-inch versions are rarer and only seen in older homes. They require a lot more space, whereas the 10-inch rough-in is an ideal alternative for small homes.
- As for the gap between toilet and side wall, reserve at least 15 to 18 inches of clearance. However, this may change depending on local regulations.
- More space is required for the front of the toilet—there shouldn’t be any obstruction within at least 21 inches. This standard is also subject to change according to the local building codes.
FAQs
Reasons for fixing gap between toilet and wall
When the gap between the wall and toilet is too big, it can consume too much free space within your bathroom. While this wouldn’t be much of a problem in spacious bathrooms, it can make small areas feel even more cramped.
What’s more, it can be a matter of aesthetics—a toilet too far away from the wall can feel out of place. And most importantly, such a big gap means items will be more likely to fall into the tight space behind the fixture.
What is the cause of this problem?
As mentioned above, there isn’t any strict regulation regarding the distance between the cistern and the wall. That said, by following the 12-inch rough-in regulation, you’ll get one inch of free space between the tank and wall.
This small gap between the toilet and the wall isn’t really an issue—if anything, it makes removing the toilet tank’s lid easier. The issue would only arise when you use a modern toilet with a 12-inch rough-in for a plumbing system intended for a 14- or 16-inch layout in older homes.
Tips to prevent the gap between toilet and wall
- Measure the bathroom space: Before installing a toilet, accurately measure the space where you plan to install it. This will help you position the fixture in a convenient place while ensuring adequate distance between the toilet and wall.
- Choose a toilet with the right dimensions: When selecting a toilet, pay attention to the rough-in measurement and bowl projection to ensure the fixture will fit properly in your bathroom space without leaving a big gap.
- Install the toilet correctly: When installing a toilet, follow the manufacturer’s instructions and building regulations to a tee. Proper installation is critical to ensure that the toilet fits securely and doesn’t leave a gap between the wall and the toilet.
How to fix the gap between toilet and floor?
The gap between the toilet and floor is pretty easy to fix—all you have to do is apply some toilet gap filler, such as caulk, under its base.
Should the gap cause the toilet to wobble when someone sits on it, you should insert a shim underneath the gap first. Once you’re sure the toilet is firm and level, caulk around its base to hide the shim.
What is a good gap between toilet tank and bowl?
The gap between toilet tanks and bowls should be ¼ to ½ inch. There should be washers and nuts on the tank bottom and under the bowl, which you can tighten to secure the two parts together.
Conclusion
As you can see, learning how to fix gap between toilet and wall is pretty easy. Only when the gap is too severe would the solution become more complicated. If this is the case, you should get help from professionals—fixing the issue yourself can do more harm than good.
The post How to Fix Gap Between Toilet and Wall? – 4 Methods appeared first on Arthitectural.
