How To Do Basic Window Air Conditioner Repairs?
Cleaning components like the evaporator, condenser, and air filter is the first step of the window air conditioner repair process. Other steps include checking for refrigerant leaks, straightening the coil fins, replacing the capacitor, and installing a dedicated circuit for the unit. If your window air conditioner isn’t working properly, the first thing you may […]
The Importance Of Air Conditioners
 It is almost impossible to imagine modern life without air conditioners, especially with rising global temperatures. These appliances not only make life more comfortable but have become a necessity that most people cannot live without in today’s era.
Air conditioners have become the best solution to prevent deaths and illnesses caused by heat. According to the Environmental Protection Agency, there were over 9,000 heat-related deaths in America between 1979 and 2013. These machines can keep you cool and also help filter and remove pollutants from the air, preventing indoor air pollution.
Similarly, they are very effective in keeping out insects that can cause allergies and diseases. And since temperatures are cooler inside, it is easier to work than in sweltering heat. Thus, air conditioners can help improve productivity as well.
Another factor that many people overlook is that room air conditioners can be very useful in increasing the lifespan of the furniture. Many types of furniture, especially wooden ones, can easily get damaged by moisture. AC units remove heat and moisture from the room, keeping the furniture pieces protected.
Then there is the fact that electronic devices are less likely to overheat in cooler environments. Your computers and phones will last longer when they are kept in a cool location. Similarly, they can protect fabrics from mold, which can grow in damp environments.
It is almost impossible to imagine modern life without air conditioners, especially with rising global temperatures. These appliances not only make life more comfortable but have become a necessity that most people cannot live without in today’s era.
Air conditioners have become the best solution to prevent deaths and illnesses caused by heat. According to the Environmental Protection Agency, there were over 9,000 heat-related deaths in America between 1979 and 2013. These machines can keep you cool and also help filter and remove pollutants from the air, preventing indoor air pollution.
Similarly, they are very effective in keeping out insects that can cause allergies and diseases. And since temperatures are cooler inside, it is easier to work than in sweltering heat. Thus, air conditioners can help improve productivity as well.
Another factor that many people overlook is that room air conditioners can be very useful in increasing the lifespan of the furniture. Many types of furniture, especially wooden ones, can easily get damaged by moisture. AC units remove heat and moisture from the room, keeping the furniture pieces protected.
Then there is the fact that electronic devices are less likely to overheat in cooler environments. Your computers and phones will last longer when they are kept in a cool location. Similarly, they can protect fabrics from mold, which can grow in damp environments.
Why Window Air Conditioners Are Better For Smaller Spaces
When it comes to air conditioners, there are many options to consider, such as window units, portable ones, and even mini-split air conditioners. However, there are various factors you need to keep in mind when deciding which one to go with. These can include your cooling requirements, ease of installation, cost, and available space. How much space you have available for installing a room air conditioner plays a major role in determining the most suitable option. And for people living in small spaces, such as a studio apartment, a window air conditioner is the best option. The reason for that is that the major portion of such units sits outside the window, with minimal indoor space being used. Thus, you do not need to worry about your room becoming cluttered by the unit. And they have a much greater cooling capacity while being more efficient.The Importance Of Knowing How To Perform Basic Repairs
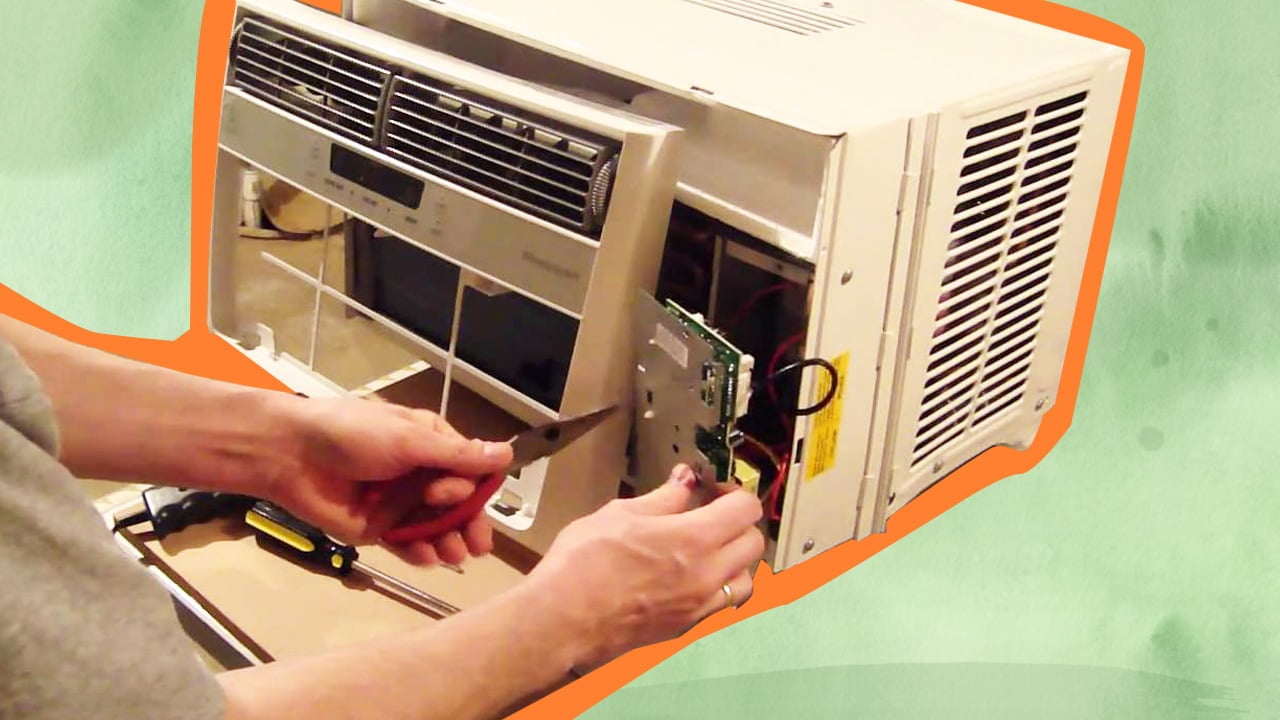
If your air conditioner isn’t working properly, the first thing you may want to do is to call a maintenance professional. But extensive repairs can be quite expensive and may take a lot of time. What many people are unaware of is that several of the low-level or basic repairs can be performed without hiring an HVAC technician. In fact, I recommend performing such repairs on your own since it won’t take much time and does not require a lot of skill. Additionally, sometimes, your air conditioner may break down in the middle of summer, and you may have to wait a long time for emergency repair services. In such situations, knowledge about the repair process can help save time and eliminate dependence on repair services. So, knowing how to perform basic air conditioner repairs can be quite handy. But before I share some basic repair techniques, you should know about the various components that make up an air conditioner.Main Components Of A Window Air Conditioner
1. Grille Cover Or Face Panel There is a metal or plastic cover on the front of an air conditioner that will have to be removed to access the internal components of the unit. This cover is generally secured by clips and tabs, screws, or both. 2. Filter The filter is a thin screen that prevents dirt and dust from entering the unit, keeping the internal components safe. It may be located behind the cover or inside the air conditioner and cleans the air before it is recirculated. 3. Evaporator A copper tubing with thin aluminum fins makes up the evaporator in an air conditioner. It is located at the back of the filter and contains a refrigerant that cools the hot air present in the room. 4. Condenser The condenser has parts similar to the evaporator, including the thin fins, copper tubing, and refrigerant but performs a different function. It collects the hot air in the room and sends it outside using the condenser fan. 5. Refrigerant It is the role of the refrigerant to cool hot air by circulating through the evaporator and condenser coils. It is in a gaseous form in the evaporator coil and a liquid form in the condenser coil. 6. Compressor The compressor changes the refrigerant into a cold liquid that circulates inside the evaporator coil and into a hot liquid that moves within the condensing coils. It has a motor and is located between the evaporator and condenser. 7. Capacitor This component is a small cylinder and is responsible for powering the fan motor and the compressor. It connects to these components through two terminals at the top of the cylinder. 8. Compressor Fan The compressor fan helps cool the compressor coils by blowing air against them. 9. Blower For cooling the room, the blower has to pull hot air to the evaporator coils, where it can cool down before being circulated back. It is situated on the side of the fan. 10. Thermostat The thermostat senses the temperature of the room and can control when the room air conditioner needs to be switched on or off. It is generally in the form of a tiny tube made of copper, three to four inches long, and is located in front of the evaporator. 11. Drain Pan When hot air cools and condenses, the moisture is collected in the drain pan at the bottom, sending it to the drain port at the back. This prevents moisture from collecting inside the room. 12. Drain Port The drain port is a tiny hole in the drain pan that connects to a drain tube that sends the moisture outside.Items Required
- Shop vacuum
- Rag
- AC fin comb or thin-bladed knife
- Insulated screwdriver
- Digital Multimeter
- Bubble level
- Coil cleaner
- Can of compressed air
- White vinegar or PVC cleaning solution
- Non-contact voltage tester (optional)
Safety Precautions
Before performing any repairs, always make sure that the air conditioner has been disconnected from the power supply. You can do this by turning off the circuit breaker from the electrical panel or by removing the power cable from the outlet. Keep in mind that the capacitor can still contain an electrical charge after the unit has been disconnected. So, it needs to be completely discharged before any repairs can be performed. To do that, place the end of the screwdriver at the terminals of the capacitor. A spark or a popping sound will let you know that the capacitor has been discharged.
Air Conditioner Problems And Solutions
1. Air Conditioner Fails To Deliver Proper Cooling
There are several reasons why room air conditioners can stop cooling, such as a dirty air filter, unclean condenser, dirty evaporator, bent evaporator or condenser fins, etc. You can try these solutions to resolve the problem.- Cleaning The Air Filter
- Using Compressed Air Or Vacuum To Clean The Condenser And Evaporator
- Straightening The Fins
- Inspecting The Refrigerant Lines
- Checking The Capacitor
2. Water Dripping From The Front
- Cleaning The Drain Port
- Inspecting The Drain Pan
3. Air Conditioner Keeps Turning On And Off
When your window air conditioning unit frequently turns on and off, the process is known as short cycling. It generally happens due to an incorrectly located or dirty thermostat, improperly sized unit, unclean air filter, dirty condenser or evaporator, or leaking of the refrigerant.- Inspecting The Thermostat
- Checking The Space
- Cleaning The Components And Checking For Leaks
4. Air Conditioner Fails To Turn On
Reasons that prevent window air conditioning units from turning on include a faulty power outlet, damaged power cord, blown fuses, or a tripped circuit breaker.- Checking The Power Plug
- Examining The Outlet
- Replacing The Power Cable
- Inspecting The Fuse Or Breaker In The Cord
- Checking The Electrical Panel
4. AC Unit Blows Fuses Or Trips Circuit Breakers Frequently
If the amount of refrigerant in your air conditioning unit is inadequate, it can overheat and cause circuit breakers to trip and fuses to blow. This can also happen when using an improperly sized circuit for the unit. Window air conditioner units require 500 to 1500 watts of electricity and run on 15-amp circuits. If you use a Window AC with higher power requirements, these circuits may get overloaded.- Reducing The Circuit Load
- Installing A New Circuit Breaker
Preventive Maintenance Steps
When an air conditioning unit is maintained properly, it will require fewer repairs and continue performing well for a longer period. Here are some of the best window air conditioner maintenance techniques.1. Cleaning At The Start Of Summer
Before turning on your air conditioner for the first time at the start of the warm season, properly clean the air conditioner’s internal components. Use a vacuum to remove dirt and dust, check the AC coils, and replace a dirty filter.2. Maintenance Steps While The AC Is In Use
Regular cleaning is also required during the months your window AC is in active use. So, clean the filter, straighten bent fins, and check the internal components. The filter should also be replaced every three months.3. At The End Of Summer
When the warm season ends, remove the air conditioning unit from the window before taking it outside. Remove the front panel and the filter, and use a garden hose to wash the components. Let them dry before putting back the filter and panel. Store the unit somewhere where it will be safe from the elements during the off-season. Or use an air conditioner’s cover to protect it if it has to be installed in the window.Window AC Repairing Related FAQs
The most common problems with window AC units include leaking water, dirty air filters, electrical problems, unclean coils, air leaks, and short cycling. Many of these problems can be fixed using DIY techniques, such as cleaning and replacing damaged components, but sometimes you may need the help of professionals.
You will need a rag or cloth, shop vacuum, AC fin comb, screwdriver, digital multimeter, bubble level, coil cleaner, compressed air can, and white vinegar or PVC cleaning solution. Some of these items may already be available at your home, while others can easily be purchased from the nearby hardware and home supplies store.
Ideally, you should clean your window air conditioner filter once a month, or at the very least, once every two months during the cooling season. However, if the unit is installed somewhere with a lot of dust or the house has pets, it is better to clean it more frequently.
The filter should also be replaced every three months and washed properly before storing the unit at the start of the off-season.
First, turn the unit off to clean the air filter of your window AC. Then, remove the front panel to access the filter. Carefully remove the filter from the unit and wipe it using a damp rag to remove the dust. Wait for the filter to dry completely before installing it back.
While you can use a garden hose to wash components like the condenser, evaporator, and filter, I do not recommend using a power washer. The reason is that water is released with a lot of force from such washers, and it can damage the delicate aluminum fins on the coils of the unit.
To clean the air conditioner condenser coils, turn the unit off and disconnect the power. Then, remove the exterior casing to access the condenser. Once done, remove any debris from the area, which can include broken fins, twigs, etc. Spray the unit using a garden hose while making sure the force of the water does not damage the fins.
You can use a coil cleaner to wash the coils before rinsing and letting them dry. Finally, place the casing back and reconnect the power.
